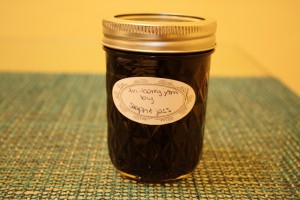
Triple Berry Jam

Summer’s coming to an end, so stock up on your berries and preserve them any way you could. Our favorite way to do this is to make jam. Though freezing is probably easier, cooking and preserving the berries is a very flavorful way to enjoy our summer produce all year long. It also makes a really nice gift!

(Berries actually freeze quite well. Make sure to clean and dry them, and then store them in a zip top bag. Make sure to suck all the air out and seal it tight so that the berries don’t get freezer burned. If you want to freeze strawberries, hull them before freezing.)

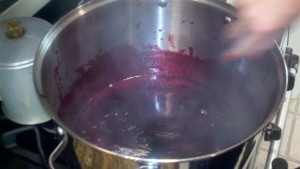
Last year we made raspberry jam with raspberries we picked ourselves from a local farm. We also made strawberry-fig jam, inspired by my backyard fig tree. This summer we decided to make more mixed fruit jams, and the apricot-nectarine turned out really orange and delicious. This raspberry-strawberry-blueberry jam is an amazing deep purplish pink color. We can’t decide if it tastes better than it looks or looks better than it tastes.

Oh, we took all the photos with my new(ish) Droid-X. Pretty cool, huh?

All jam making directions and tips are from pickyourown.org and the package of pectin.

Ingredients:

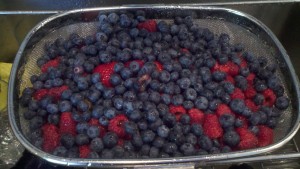
  • 10 cups of unprepared berries, we used 2 pints of blueberries, 1 1/2 pints of strawberries, and 3 (1-cup) packages of raspberries (when you mash these, you’ll have about 6 cups of fruit)
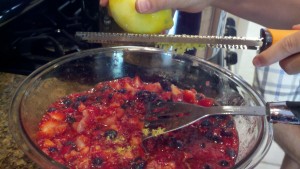
  • Juice and zest of two lemons
  • 6 cups white sugar
  • 1 package Sure Jell pectin (the yellow package)

Equipment:

  • 1 large pot
  • 2 large bowls (one for berries, one for sugar)
  • Measuring cups
  • 1 large pot
  • Potato masher
  • Mixing spoon
  • Cup of ice water and teaspoon (to test jam)

For canning:

  • Mason jars with tops and rings
  • Canning funnel
  • Magnetic lid lifter
  • Jar tongs
  • Small pot for boiling the lids
  • Pot for boiling prepared jars
  • Dishwasher or large pot for sterilizing jars

Instructions:

If you are canning, make sure to sterilize the jars. If using a dishwasher, run it without soap. If using a pot, fill the pot with water and the jars and boil. Do not touch the inside of the jars (that’s why you have the jar tongs), because that will introduce bacteria to the sterilized jars and could result in icky jam! Do this now so it will be ready when you are. Boil the lids, too.

1. Wash the fruit. Sort through it to make sure you have no bad berries or stems, etc.

2. Chop the strawberries.

3. Add the fruit to a bowl and make sure you have 10 cups. Mash.

4. Measure out the sugar. Set aside 1/4 cup of sugar and mix with the pectin. This will allow the pectin to incorporate into the fruit better, and make sure you don’t have lumpy jam.

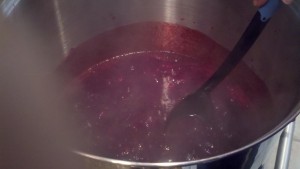
5. Add fruit to large pot and cook over high heat, stirring constantly. When it comes to a full rolling boiling, meaning it doesn’t stop bubbling even when you stir, time one minute. Add the pectin and stir until it dissolves.

6. While still stirring, add the sugar, a cupful at a time, until it is all incorporated.

7. Continue stirring constantly until the mixture comes to a rolling boil again. After one minute, test the jam to make sure it sets.

8. Take a spoonful of jam and dip it in a cup of ice water. If it gels, it’s ready to be jarred. If not, boil for another minute and test again.

9. Use a ladle or big spoon to fill the sterilized jars. Leave about 1/2 inch of space at the top.

10. Use the magnetic lid lifter to cover, making sure to clean the jars before placing the tops on. Screw on the lid.

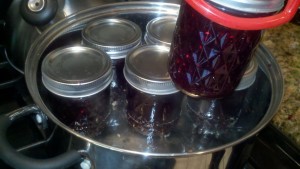
11. After all the jam is canned, place in about 2 inches of water and boil for 5 minutes (or more, depending on altitude). You will hear the tops POP, either while they are boiling or after when they are cooling. If you don’t hear the pop after a while, try boiling again or just put the jam in the fridge and use it right away. It will still be good.

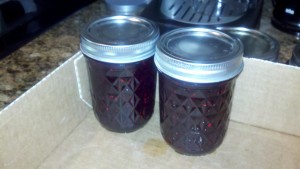
12. The boiled jars should last about a year (’til next summer).

This recipe made 10 6-oz jars of jam.

Sugarplum Cobbler

I never ate a sugar plum before this weekend, but when I saw them at the Greenmarket on Friday I decided to be brave and try something new instead of going with something I knew I loved, like blueberries. I like plums, after all, and sugar plums seemed to me like they were just cute, sweet plums.

Well, that’s basically what they are, but I didn’t finish the whole basket and after sitting on the counter ripening (I probably should have stored them in the fridge) they became rather mushy. So I decided to turn them into a cobbler and whipped up an easy biscuit recipe to spread on top.

Continue reading

Leftovers – Dill Sauce

image

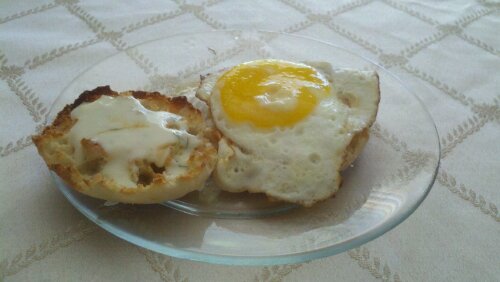
Like Lori said, this recipe makes way too much dill sauce! So here’s my not-as-fancy version of eggs benedict. Okay, so it’s nothing like eggs benedict: no hollandaise, no canadian bacon, and a sunny side up egg instead of a poached one. At least there’s a toasted English muffin involved. Continue reading

Baked Eggs With Cheddar Dill Sauce

I’ve never really thought of baking eggs in the oven, but it turns out they’re  fluffy and creamy, and definitely easy when feeding a crowd. This is the perfect Sunday brunch food, and much more interesting than making a giant pan of scrambled eggs.

I actually ate this in Napa, and decided the second I came home that I just had to try the recipe for myself, in my own kosher kitchen. It took six months, but I finally tried it, and immediately regretted not making it months ago. Continue reading

Rhubarb ‘Big Crumb’ Coffee Cake

Don’t forget to enter our giveaway!

I wanted to post this recipe before the rhubarb season escapes us. It’s pretty late now, but it’s still findable in small quantities, and really that’s all you need for this cake. I’m also pretty certain that it was be almost as good without the rhubarb filling, or with some other seasonal crop in there, like cherries or berries. Why not? Continue reading

Strawberry Muffins

I’ve made this recipe more than once, and all I can say is sorry for not sharing with you the first times! This is such an easy muffin recipe that can be adapted for the seasons or the (not so great anymore) fruit you have on hand. It’s from the Art and Soul of Baking, which has made a comeback in my kitchen now that the semester’s over and I have time for more time-consuming baked goods.

Continue reading

Cinnamon Brown Sugar Biscotti Bites

We promised you a new recipe for biscotti, and we may be delayed, but here you go!

These are very different from the last ones. They’re much easier to make, but that doesn’t mean they’re less delicious. We also cut them into much smaller pieces, allowing for much less breakage (like, we couldn’t make ice cream out of the crumbs), but you can really bake and slice them however you prefer. Continue reading

Shavuot Recipe Roundup

Shavuot is distinct from most other holidays because we traditionally eat dairy (why?). This means that we can eat gooey cheesey dinners, and more importantly, we don’t have to make desserts using fake butter like we usually do!! So we always pick out some special recipes to share with our family during this holiday.

Continue reading

Fried Smashed Potatoes

I usually don’t fry things, but the other day I happened to be really hungry and had hardly anything in the house to eat (which happens pretty often, believe it or not). I found some mini potatoes on the counter and remembered watching Giada make potatoes by smashing them and frying them. They looked great on her show, so why not try it!

This  dish is in no way filling, but it works as a snack, a side dish, or something to fend off hungry husbands until dinner time. I like it best as a side with eggs – they’re easier to make than hash browns, but still crispy like that breakfast potato we all love. Continue reading

Half-Pound Cake

Pound cake is pretty much what it sounds like…You measure out a pound of all the ingredients, mix them together, and lo and behold you have a delicious, rich cake. It lasts a pretty long time on the counter, too. If you don’t have a kitchen scale, I’m not sure this is the right cake for you. I did take note of the volume, but I’m not sure how accurate those are. My advice? Get a kitchen scale! You can get a good one for 20 dollars. The smell alone is worth it. Continue reading